CAGD 112 Digital Photography
The goal of this assignment was to create a tileable image. This meant taking the bottom image and using the healing and clone stamp tools to homogenize the image and remove any notable features. The goals of this is to create a surface that can be copied over and over to create a two dimensional surface for video games. These are often used for floors in video games.
The intended composition was a simple floor texture that will not appear repetitive even when copied over and over. The image has a large amount of clutter and detail that is visually appealing when looked at up close but not too distracting when one has to walk over many copies of it.
There is no focal point in this image which is the point of an image like this. There were no notable issues making this image though a small issue with homogenizing such a visually complex image.
The photoshop tools I used for this image were the aforementioned Healing brush and Clone stamp tools.


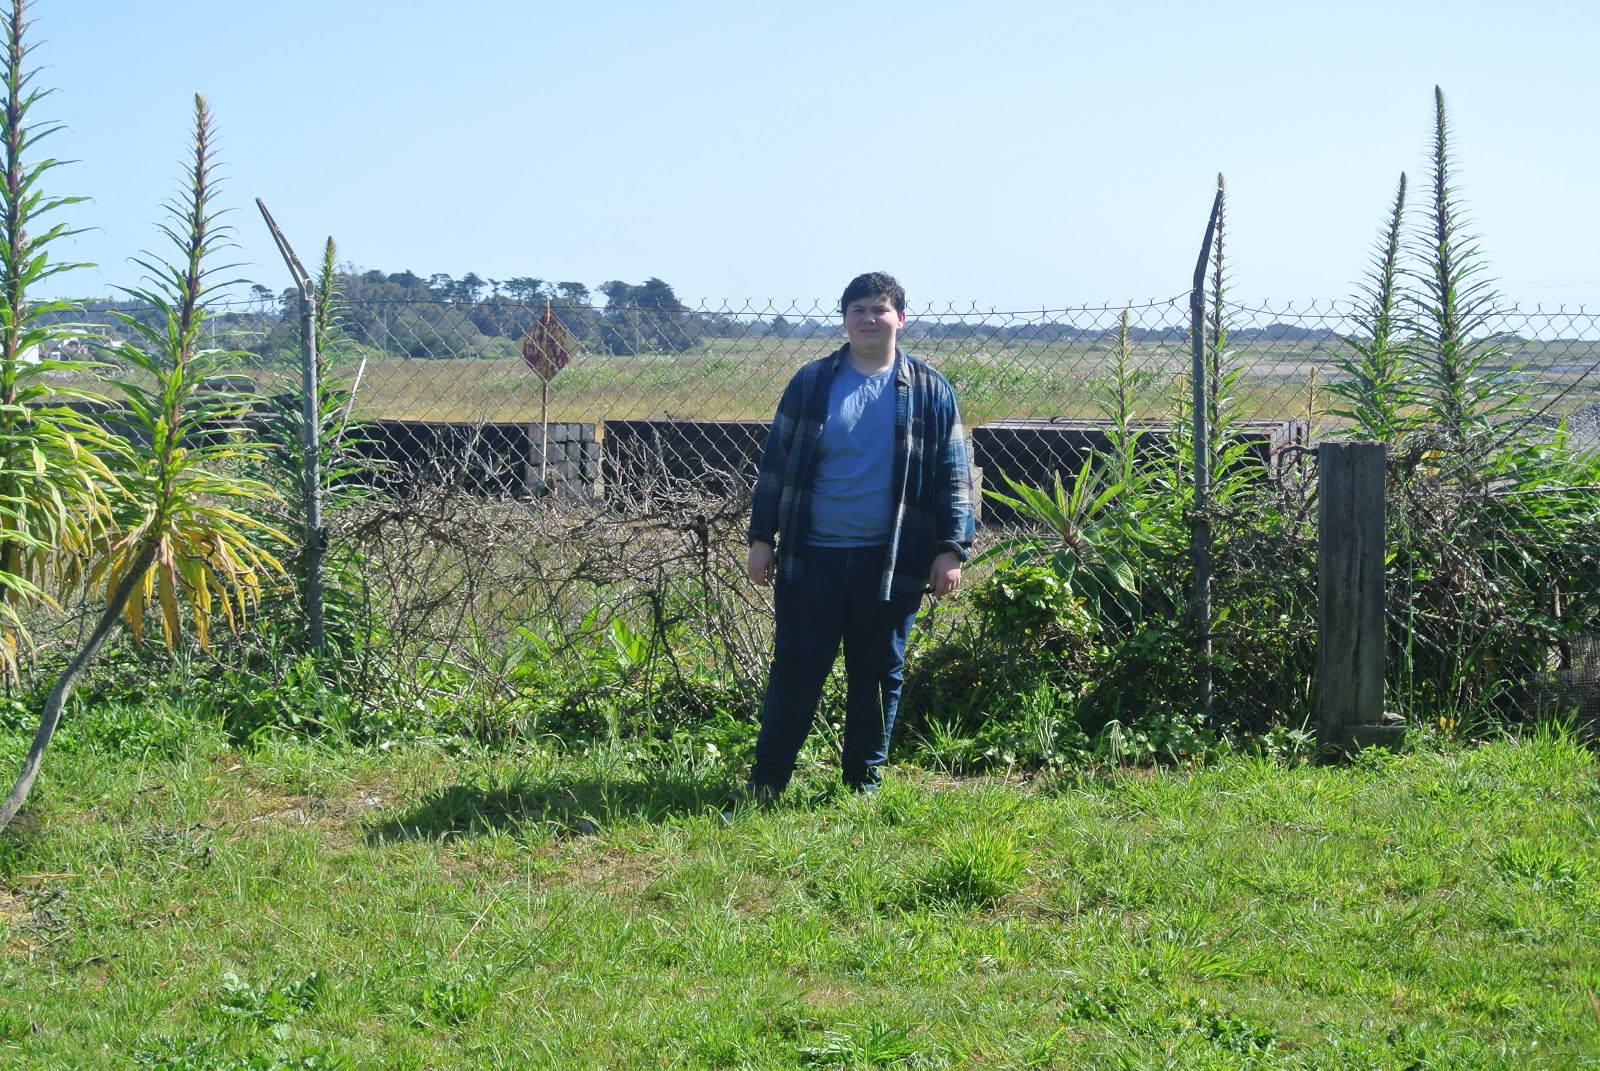
Hyper Realism Assignment
The goal of this assignment was to create a hyper-realistic image using multiple original images and a large variety of photoshop tools. The final image should appear to realistically create an impossible image. The photos I used had to be taken by myself.
The intended composition of this image is that of a set of clothes standing against a landscape. The focal point of the image is the set of clothes in the center foreground of the image with a large seashell fading into the horizon beyond.
I feel I did a pretty good job of drawing the viewer's eye to the set of clothes though the shell in the background does distract somewhat from the intended focus.
There were a few issues as the final images were not my first choice for this assignment and the shell was a last minute decision to spice up the composition.
The post-processing photoshop tools I used include: layer masks to create the empty clothes effect, brightness altering, hue altering, contrast altering, color balance altering, and making the shell black and white due to the orange hue of the original image.


The goal of this lab was to alter a number of images using a variety of post-processing photoshop to improve the original images and create some interesting and unique effects.
These images had their own original compositions which have largely went unaltered after my editing process. The focal point in most of these images remained intact with the exception of the hair recoloring one which due to the drastic changes in color the focal point has moved from the face and eyes to the hair. This change is due to the sheer brightness and contrast of the new hair color even in comparison to the contrast of the original and the new focal point has surely succeeded in drawing in the eye.
There were no real issues with this lab. Almost everything went perfectly fine except for a self imposed challenge I tried in the 1st image by removing part of the watermark from the person's face.
The post-processing photoshop effects I used on the first image were high and low frequency versions of the original image layer combined along with some use of the clone stamp and healing tool which were used to remove some blemishes and clear away the watermark from the chin. The second image primarily used color balance and layer masks to create the effect. The third image used the curves tool, hue/saturation tool, and layer masks to create its effect.


Panorama Lab
The goal of this lab was to create a composite image without using the automatic tools such as the hdr tool in photoshop and other apps. The final image was assigned to be as accurate/aesthetically appealing an image of the original scene as possible.
The composition of the scene focuses around conveying the landscape shot of this house and the surrounding trees, sky, and swamp. The focal point of the image is the house in the right-center of the image. The image does convey this focal point quite well.
There were no notable issues with the creation of this composite image. it was somewhat challenging to realistically patch the seams and edges of the image.
The post-processing photoshop tools I used in the creation of this image included: layer masks, image stitching, spot healing/healing brush, and clone stamp tools. The most important tools were the spot healing/healing brush tools and the clone stamp tool which were used to patch the holes in the stitches together panorama.


On the Edge Assignment
The On the Edge Assignment was an assignment where I had to take a picture of an object where said object is one the edge of the shot (hence the name). The object also had to be at least five feet away from the camera and the final image would have to be in gray-scale.
The focal point of the image is the pine-cone as it is the most visually interesting part of the composition. There is also the dark wall corner which attracts the eye due to the harsh difference in color along the edge. I feel the eye is well drawn to the pine-cone and creates a very modern art feeling sort of image with little obvious symbolism.
In the final image I used several photoshop tools to improve it. I changed the image to gray-scale for the first change. I also messed with brightness, saturation, and hue to further accentuate the light and dark aspect of the image.


Things Assignment
The goal of the things assignment was to take a look at the everyday images around us that we don't pay attention to and take interesting photographs of these "things".
When I was working on this assignment I looked at simple things around my dorm that might be at least somewhat visually interesting. The most interesting of these was the peephole viewed from the outside. Much like a camera a peephole is a lens with which to view the world. This particular one was rather large with concentric rings of various materials, colors, and thickness creating a visually complex shape. Peepholes are common in many doors and rarely used. Rarer still is looking or paying attention to the outside of the peephole.
The focal point of the image is the peephole itself as the only interesting part of the picture. While the background is not blurry it is about as boring as a background can be and draws the viewers eye towards the visually complex peephole. The light reflection off of the peephole is notably bright drawing the viewer's eye in.
The original picture suffered some issues due to not yet knowing how to modify light settings on my new camera. This led to the shots being very dark and hard to see. This would have to be fixed in photoshop.
I used a variety of techniques to modify the image including changing the brightness of the overall image so the whole peephole could be seen. In order to do this I modified brightness and exposure. I also messed with saturation, hue, and color balance in order to make the peephole more visible. This had the side effect of making the wood look distorted and strange but did not alter so badly that it distracted from the main focus.


The goal of this assignment was to take three pictures of a scene with different lighting amounts and merge them together as an hdr image in lightroom before finishing editing in photoshop.
The composition of this scene is that of the creek going through campus and the bridge and plant life that went over it. There is a tree on the right side of the image that hangs over the rest of the visually busy composition. There is the bridge behind the tree in the back of the image which cuts the image horizontally. This is by far the busiest image I have worked with in this course but this gives it a unique look and feel.
The focal point of the image is the bridge which is a fragment of man in the midst of a wild natural scene. It stands out due to the difference in color and alignment compared to the rest of the image. the majority of other elements within the image are vertical in nature going from the bottom of the image towards the top. The bridge stands out due to being on a different axis. This is accentuated by the creek itself which forms the proverbial y axis of the image by breaking it up into quarters with the aid of the bridge.
There were several problems when working on creating this hdr and the photos for it. My camera lacked the feature to easily automate the process which meant I would have to manually adjust lighting. This lead to another issue as the manual settings did not go very dark. This was a problem as I was shooting outdoors on a bright mid-morning which made all of the shots, even the dark one, rather bright. In fact only the dark looked semi-normal and not overlit. I took several other potential shots of other scenes but this was the only one to hdr properly in lightroom.
I modified this image a fair bit in photoshop. I messed quite a bit with the brightness and contrast to reduce the overlighting. I messed with the vibrance a bit but not that much. I changed the hue and saturation making the image far more saturated in the process creating a surrealistic feel. I also messed with the color balance to offset the other changes and keep the image fairly bright in colorful in spite of changes to the contrary.


Comments
Post a Comment